Skip to content
formulatrix-logo

ROCK IMAGER V4.1

  • What’s New in ROCK IMAGER v4.1
  • Release Notes
  • Hardware Overview
  • System Requirements
  • Best Practices
  • Software Overview
    • Settings Menu
    • Tools Menu
    • Temperature Menu
    • Schedule Menu
    • Plate Menu
    • Status Bar
    • System Overview
    • Imager Menu
      • Focus Graph Sub-menu
      • Drop Location Sub-menu
      • EFI Sub-menu
      • Live Image Sub-menu
      • Imager Menu
      • Live Image Sub-menu
        • Leveling Histogram
        • Optics and Camera Control Panel
        • Well Control Panel
    • Plate Setup Menu
      • Applying Image Masks
      • Tuning Plates in ROCK IMAGER®
      • About Plate Type Calibration
      • Plate Setup Menu
      • Defining Default Imaging Settings
    • Report and Support
      • User Management
      • Licensing
      • Event Log Table
  • Imaging Plates
    • Concepts
      • ROCK IMAGER Processor (RIP)
      • Multi-Fluorescence Imaging (Optional)
      • Single Light Path (Optional)
      • Visible Light Imaging
      • Manual and Automatic Imaging Modes
      • UV Imaging (Optional)
        • UV FAQs
        • UV Compatible Plates
        • UV Light Path
        • UV Absorption Imaging
        • UV Imaging (Optional)
    • Tutorials
      • Searching for Plate
      • Viewing a Plate’s Content
      • Adding and Removing Plates
      • Initiating an On-Demand Imaging Session
  • Home
  • Docs
  • ROCK IMAGER®
  • ROCK IMAGER V4.1
  • Software Overview
  • Plate Setup Menu
  • Applying Image Masks

Applying Image Masks

Image masks are used to hide autofluorescence that appears around the edges of certain plate types in order to get more accurate Auto Scoring results. Auto Scoring classifies each ultraviolet image as a positive or negative hit using a proprietary algorithm that analyzes image intensity, edges, sharpness, and objects detected. By hiding irrelevant fluorescence, image masks reduce the probability of a false positive.

A mask is set on a particular drop on the plate, then the mask will apply to all drop locations on the plate. Once you set an image mask on a certain plate type, the mask will also be applied to all the other experiments that use the same plate type.

Prerequisites:

  • You will be imaging the plate using Ultraviolet lightpath.
  • You want to improve ROCK IMAGER Processor’s Auto Scoring results.
  • You are running ROCK MAKER version 2.7 or newer.
  • Your plate is already inside the imager.
  • You have already tuned the drop positions for the plate.


To apply an image mask:

  1. Go to Plate Setup and select Image Mask.
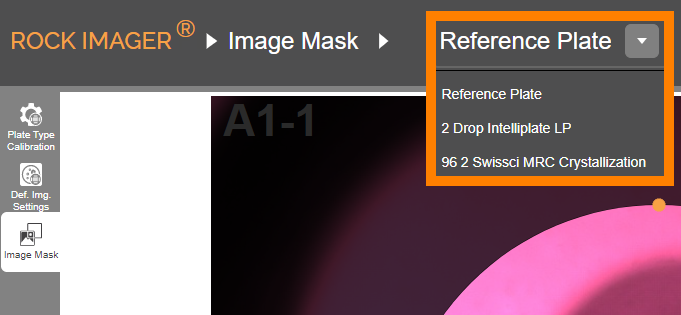
  2. Select the plate type of interest from the plate list.

    Selecting the Plate of Interest

    Selecting the Plate of Interest

  3. Turn the Live Stream ON and navigate to the desired drop using the Well Control panel.
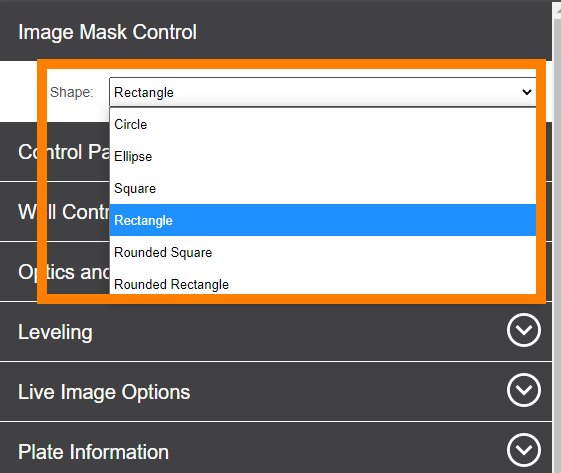
  4. In the Image Mask Control panel on the right side of the screen, select the shape of interest.

    Selecting the Shape of Interest

    Selecting the Shape of Interest

Note: If the image of your drop is not clear enough, use the manual imaging controls under the Image Mask Control panel. See Optics and Camera Control Panel for assistance.

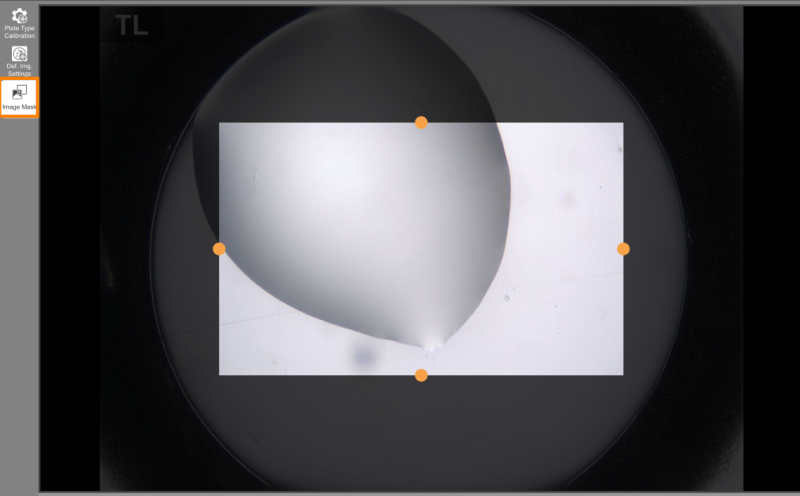
  1. Set the size and position of the image mask on the image with your mouse. The irrelevant part of the plate should be outside the region you set.

    Setting the Image Mask

    Setting the Image Mask

  2. Once you are satisfied with the mask, click Apply.

Frequently Asked Question:

➤ Where can I view the results of Auto Scoring?

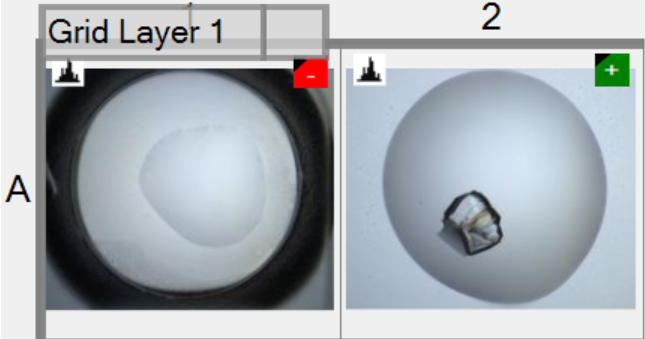
Answer: The auto scores for each drop image can be viewed in ROCK MAKER and are displayed in the Canvas. Auto Scores are represented by a green plus (positive hit) or a red minus sign (negative hit).

Auto Scores for UV Drop Images

Auto Scores for UV Drop Images

Related Topics

  • Optics and Camera Control Panel
  • Well Control Panel
ROCK IMAGER 4.1
Updated on June 7, 2024

FORMULATRIX® is proudly powered by WordPress
Scroll To Top