Skip to content
formulatrix-logo

FLO i8 2.7

  • Specifications
  • Instument and Software Overview
    • Instrument Overview
    • Software Overview
  • Using the FLO i8 System
    • Concepts
      • Concept Definitions
      • Pauses in a Protocol
      • Pipetting Parameters
      • Sound Settings
      • Status Bar
      • List of Transfers
      • Dispense Report
        • Dispense Report
        • Dispense Report Explorer
    • Tutorials
      • Getting Started with FLO i8
      • Using the Pipetting Parameters
      • Adding a User Confirmation
      • Adding a Delay
      • Exporting Workflow
      • Importing Workflow
      • Powering Off the FLO i8
      • Creating a New Protocol
        • Creating a New Protocol
        • Creating a Simple Transfer
        • Creating a Serial Dilution
      • Executing a Protocol
        • Executing a Protocol
        • Adjusting a Protocol
        • Virtual Deck Layout Overview
  • Administrative Tasks
    • Managing Dispense Reports
    • Labware Manager
      • Labware Manager
      • Creating a New Labware
      • Managing Existing Labware
    • User Manager
      • User Manager
      • Managing User Account
    • Licensing
      • Licensing
      • License Activation and Reactivation
      • Software Upgrade and Revert
  • API Integration
    • API Integration V2.1
    • API Integration V2
    • API Integration V1.1
  • Troubleshooting
    • FAQs
    • Replacing O-rings
    • Replacing 3A Fuse
    • Error Recovery
      • Error Recovery
      • Error Recovery Settings
  • Help & Support
    • Help & Support
    • Reporting Errors Using Log Packages
  • Home
  • Docs
  • FLO i8® Liquid Handler
  • FLO i8 2.7
  • Using the FLO i8 System
  • Tutorials
  • Getting Started with FLO i8

Getting Started with FLO i8

To use the FLO i8 system, you must first set up the FLO i8 instrument and software. For more information, see Instrument Overview and Software Overview.


Prerequisites:

  • The FLO i8 system is either connected to a local network (ethernet or Wifi) or directly connected to a computer (peer to peer ethernet connection).
  • You have installed Google Chrome version 69 or newer on your computer.


To start up FLO i8:

  1. Connect the FLO i8 to a power outlet using the power cable.
  2. Locate the power switch at the back side of the FLO i8 instrument, and switch it on. When the power is connected to the instrument, the power button turns red.
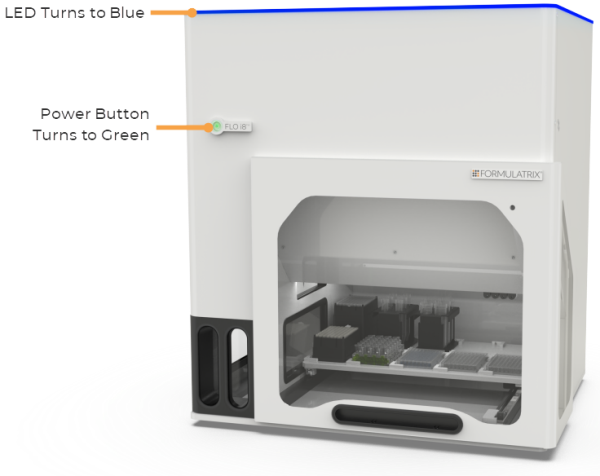
  3. Press the power button at the front and wait for the initialization. When the instrument is active, the power button turns green and the LED indicator turns blue. For more information, see Instrument Overview.

FLO i8 is Initializing

FLO i8 is Initializing

Note: If the power button does not change color, check your network connection and/or the power outlet. If the problem persists, contact FORMULATRIX support for assistance.

  1. Turn the computer on, and open Google Chrome.
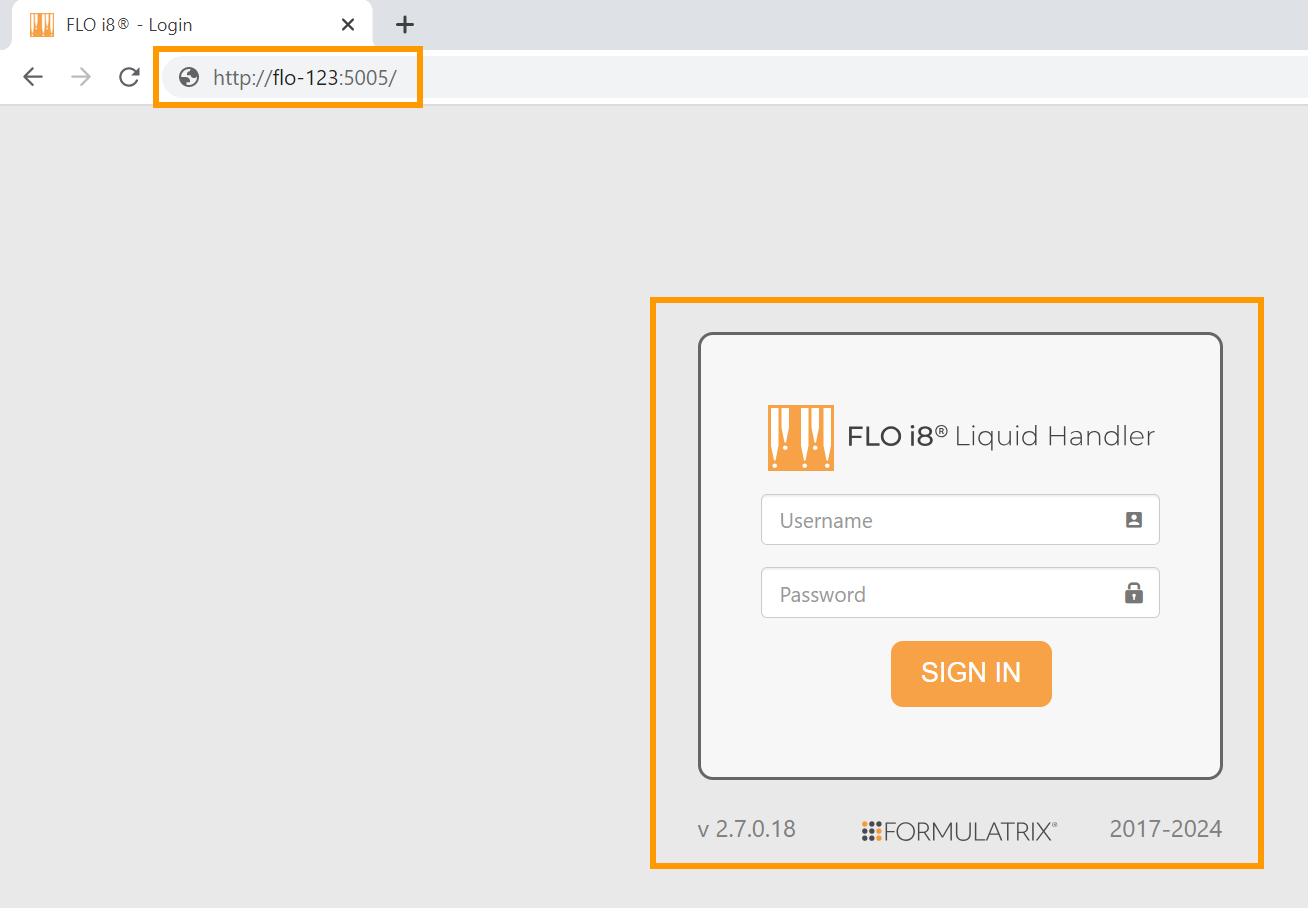
  2. Type the following URL: http://flo-X:5005/.

Note: X represents the instrument serial number, and is followed by :5005 to specify the connection port. For example, if the instrument serial number is FL-2-00123, then the address is http://flo-123:5005/.

  1. Then, press Enter to open the FLO i8 software.

Note: To ensure the best viewing experience, we recommended setting the screen display to full screen.

  1. Then, press Enter to open the FLO i8 software.

Sign In Page in the FLO i8 Software

Sign In Page in the FLO i8 Software

  1. Now you’re ready to start using FLO i8! See Creating a New Protocol for more information.


Related Topics

  • Creating a New Protocol
  • Instrument Overview
  • Software Overview
  • User Manager
FLO i8 2.7
Updated on June 3, 2024

FORMULATRIX® is proudly powered by WordPress
Scroll To Top