Replacing 3A Fuse
The 3A fuse ensures the safety of the electrical flows powering the FLO i8 system. If you encounter power disconnectivity, you might need to replace the fuse. The FLO i8 accessory kit box includes 2 spare 3A fuse. Follow the steps below to replace the fuse on the connection panel.
Prerequisites:
- You have powered off the instrument.
- You have disconnected the power cord from the instrument.
Required Parts:
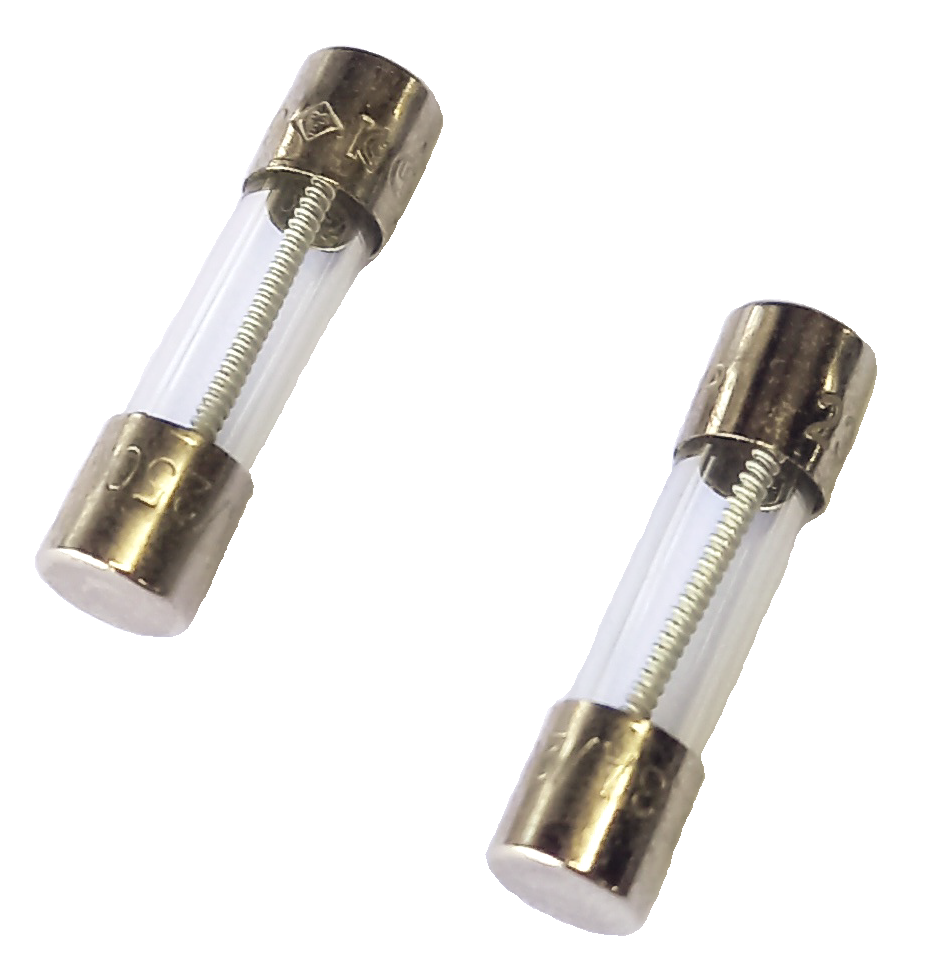
- 2 pcs of 3A FUSE (250V, UL SLO-BLO, 5×20 mm)
Required Tool:
- A pair of tweezers
To replace 3A fuse on the connection panel:
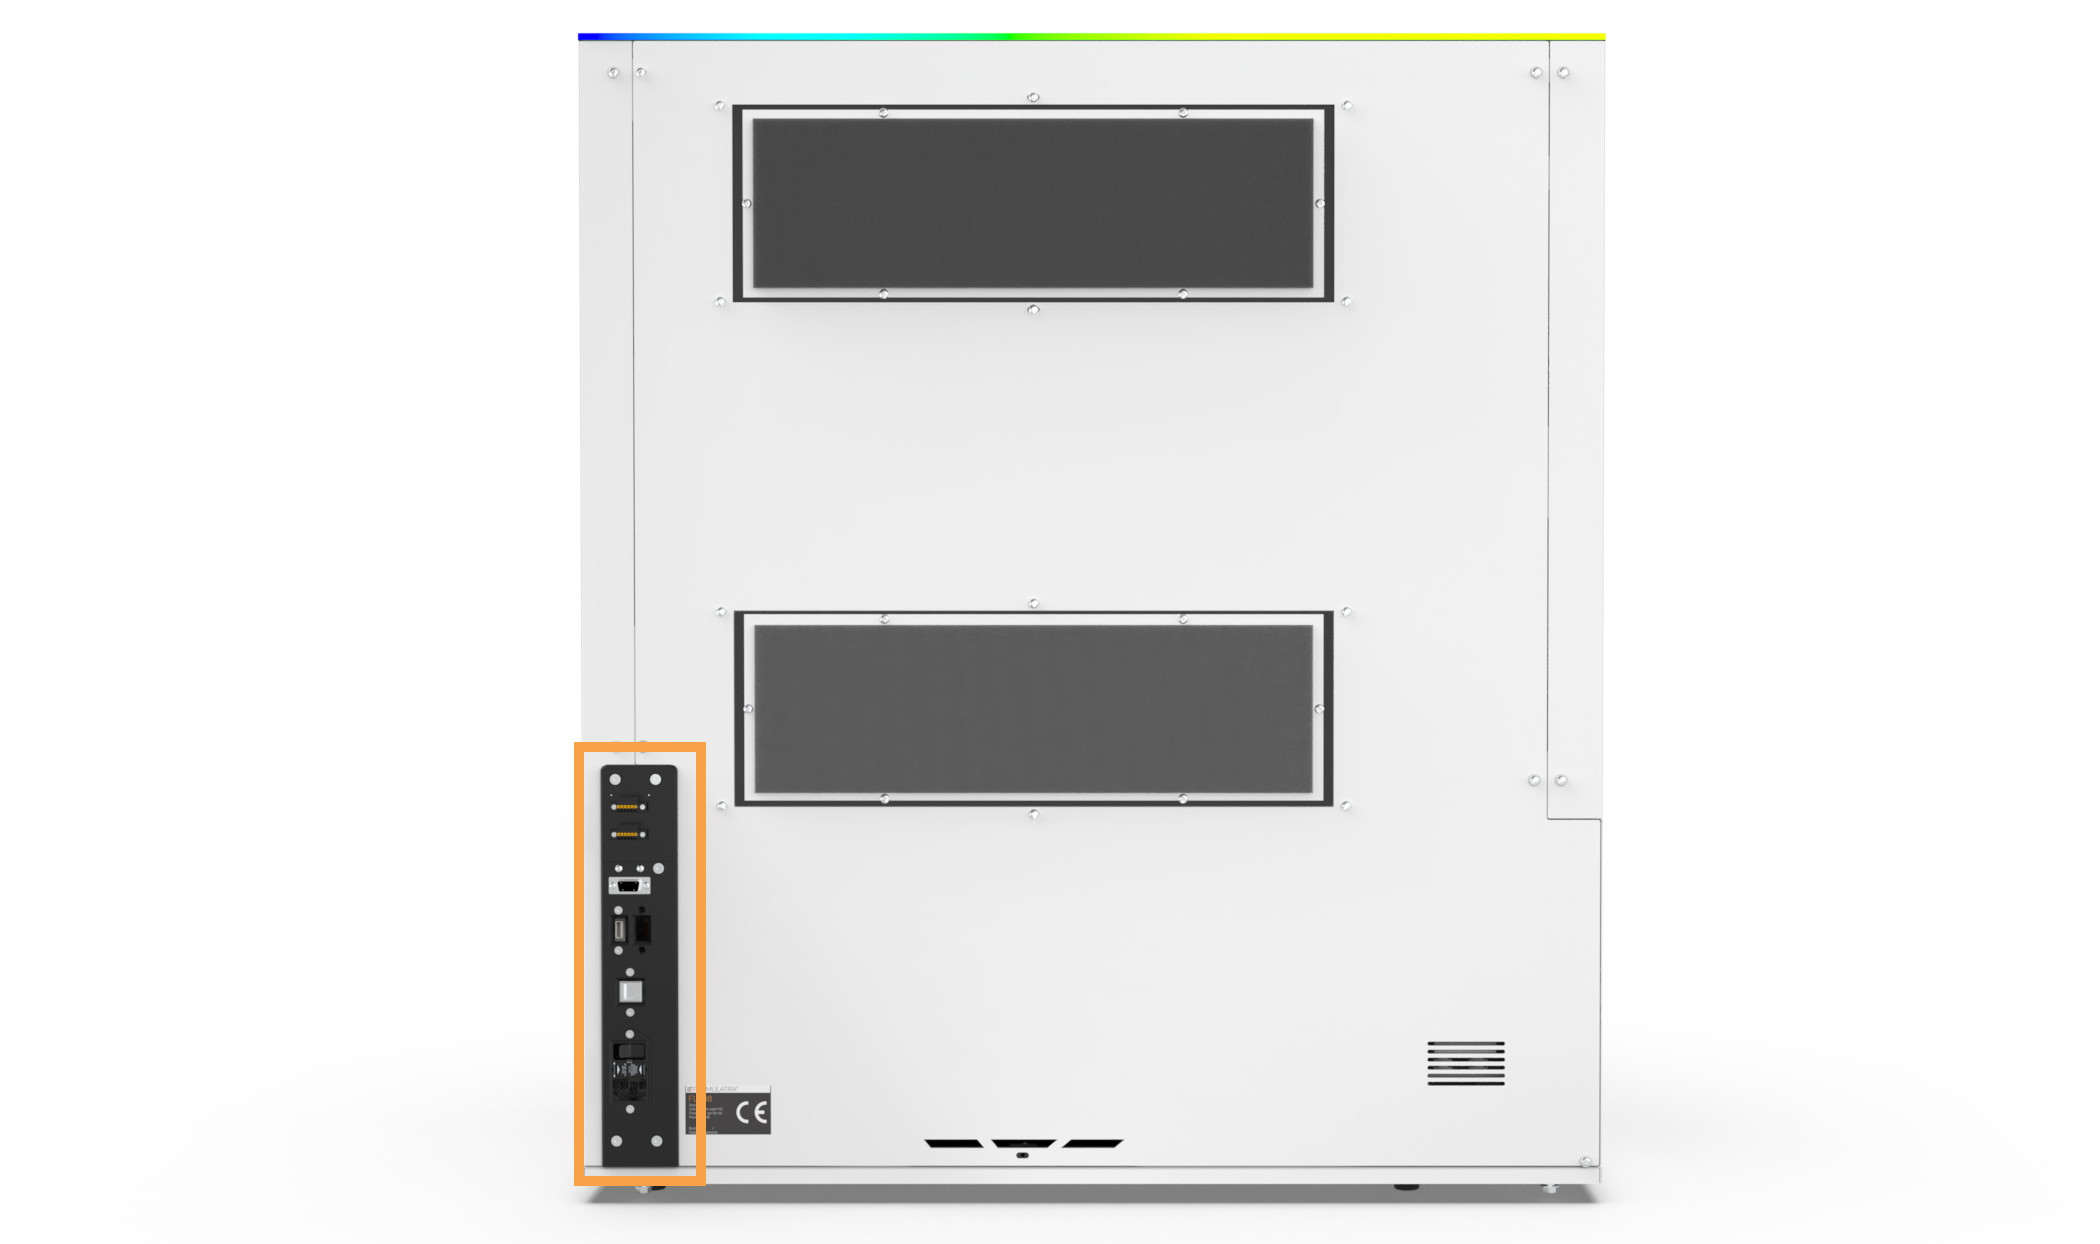
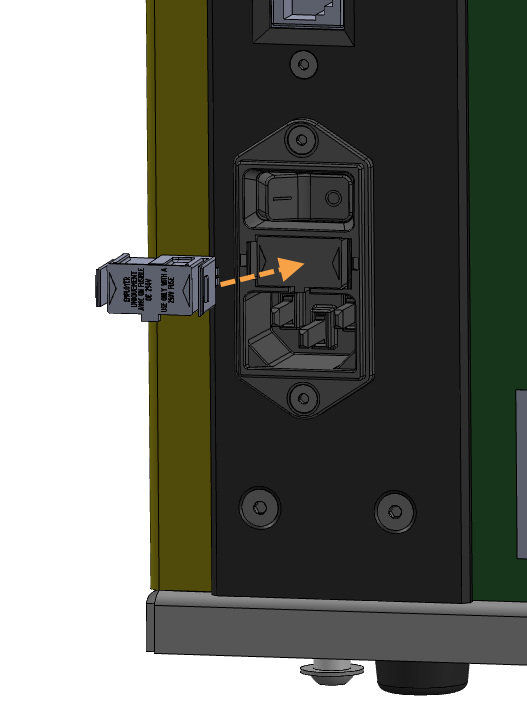
- Locate the connection panel at the back-left of the instrument.
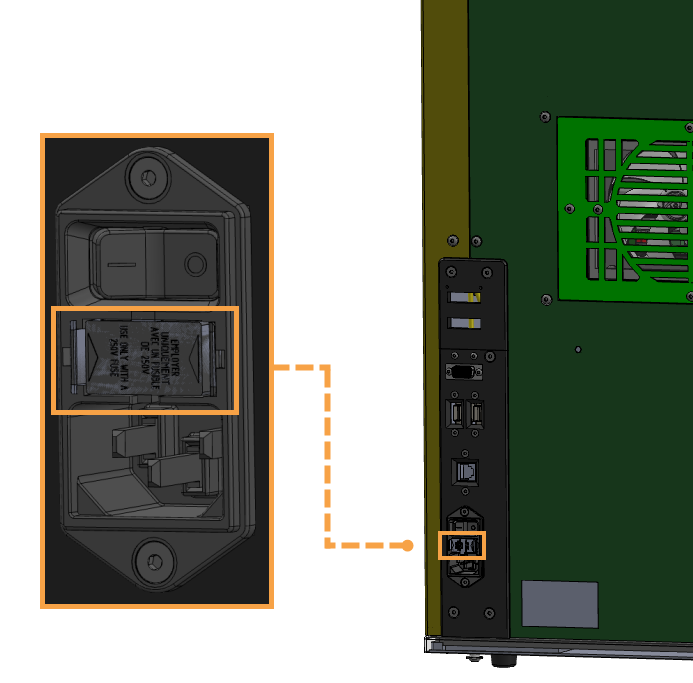
- Locate the fuse drawer in between the power button and power socket.
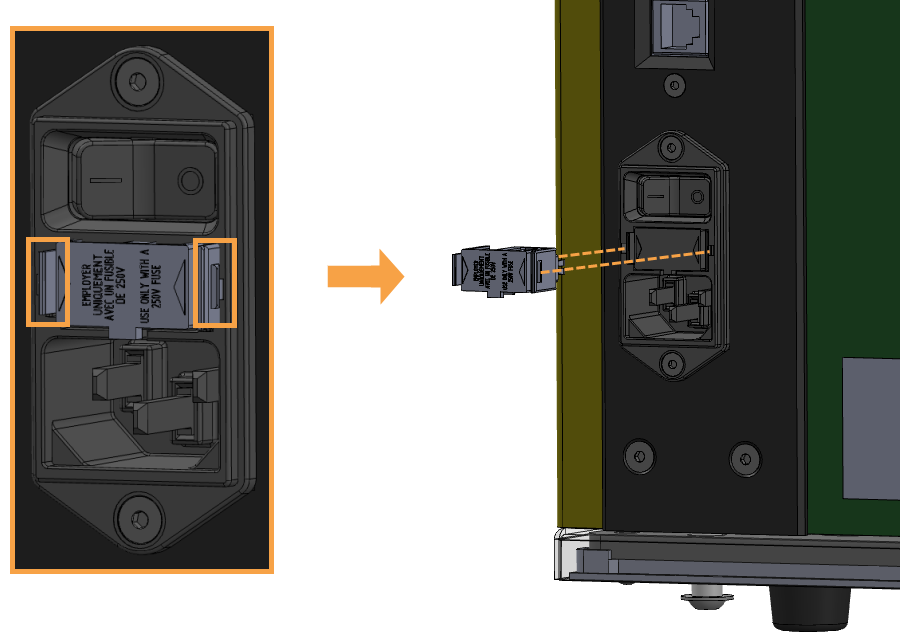
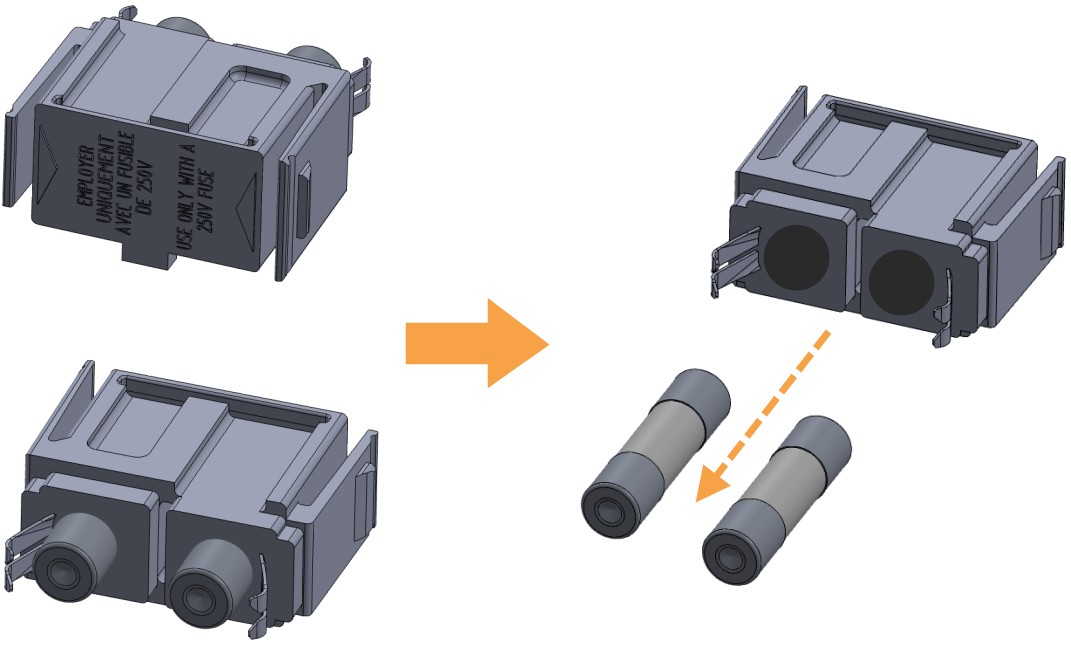
- Take out the drawer from the connection panel by sliding the tweezers’s tips to the holes as seen in the image below.
- Remove the broken fuse at the back of the drawer. Then, replace them with the new ones.
Note: You can install the 3A fuse in the drawer in any position.
- Place the drawer back to the connection panel.
- Plug the power cord back to the connection panel. Then, turn on the instrument.
