Skip to content
formulatrix-logo

FLO i8 2.7

  • Specifications
  • Instument and Software Overview
    • Instrument Overview
    • Software Overview
  • Using the FLO i8 System
    • Concepts
      • Concept Definitions
      • Pauses in a Protocol
      • Pipetting Parameters
      • Sound Settings
      • Status Bar
      • List of Transfers
      • Dispense Report
        • Dispense Report
        • Dispense Report Explorer
    • Tutorials
      • Getting Started with FLO i8
      • Using the Pipetting Parameters
      • Adding a User Confirmation
      • Adding a Delay
      • Exporting Workflow
      • Importing Workflow
      • Powering Off the FLO i8
      • Creating a New Protocol
        • Creating a New Protocol
        • Creating a Simple Transfer
        • Creating a Serial Dilution
      • Executing a Protocol
        • Executing a Protocol
        • Adjusting a Protocol
        • Virtual Deck Layout Overview
  • Administrative Tasks
    • Managing Dispense Reports
    • Labware Manager
      • Labware Manager
      • Creating a New Labware
      • Managing Existing Labware
    • User Manager
      • User Manager
      • Managing User Account
    • Licensing
      • Licensing
      • License Activation and Reactivation
      • Software Upgrade and Revert
  • API Integration
    • API Integration V2.1
    • API Integration V2
    • API Integration V1.1
  • Troubleshooting
    • FAQs
    • Replacing O-rings
    • Replacing 3A Fuse
    • Error Recovery
      • Error Recovery
      • Error Recovery Settings
  • Help & Support
    • Help & Support
    • Reporting Errors Using Log Packages
  • Home
  • Docs
  • FLO i8® Liquid Handler
  • FLO i8 2.7
  • Troubleshooting
  • Replacing 3A Fuse

Replacing 3A Fuse

The 3A fuse ensures the safety of the electrical flows powering the FLO i8 system. If you encounter power disconnectivity, you might need to replace the fuse. The FLO i8 accessory kit box includes 2 spare 3A fuse. Follow the steps below to replace the fuse on the connection panel.

Prerequisites:

  • You have powered off the instrument.
  • You have disconnected the power cord from the instrument.

Required Parts:

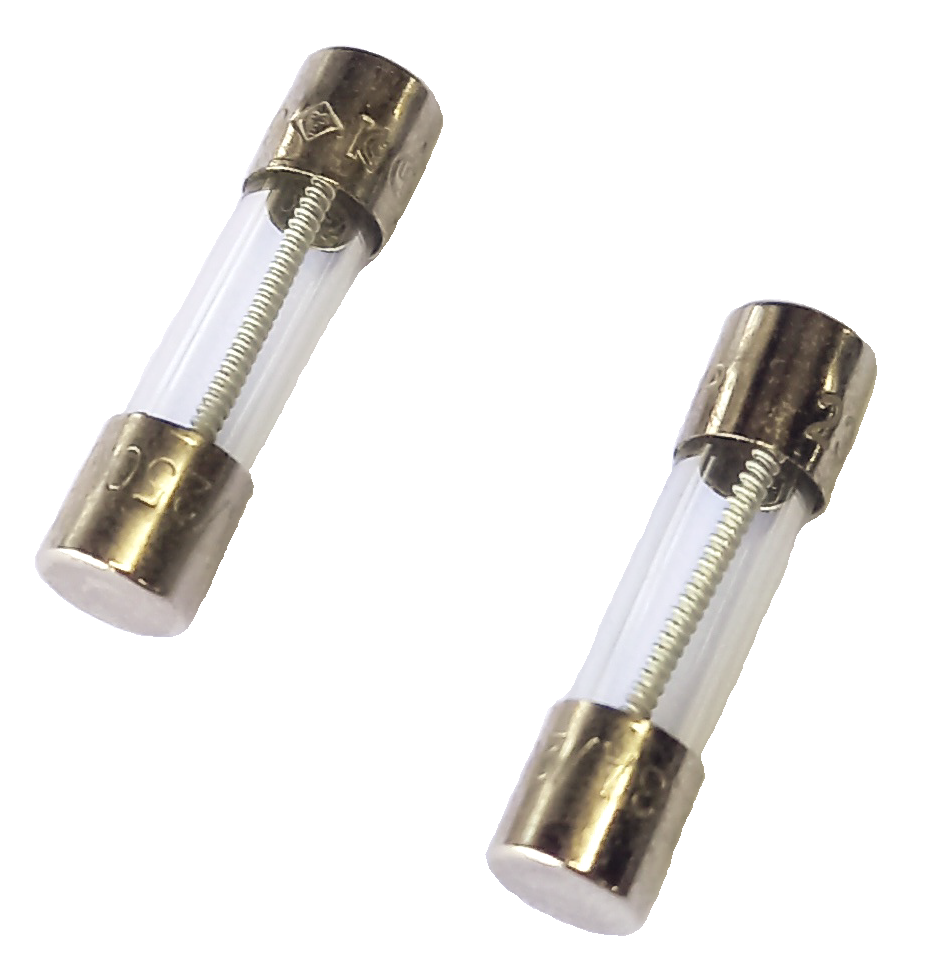
  • 2 pcs of 3A FUSE (250V, UL SLO-BLO, 5x20 mm)

FUSE 3A Part

FUSE 3A Part

Required Tool:

  • A pair of tweezers

To replace 3A fuse on the connection panel:

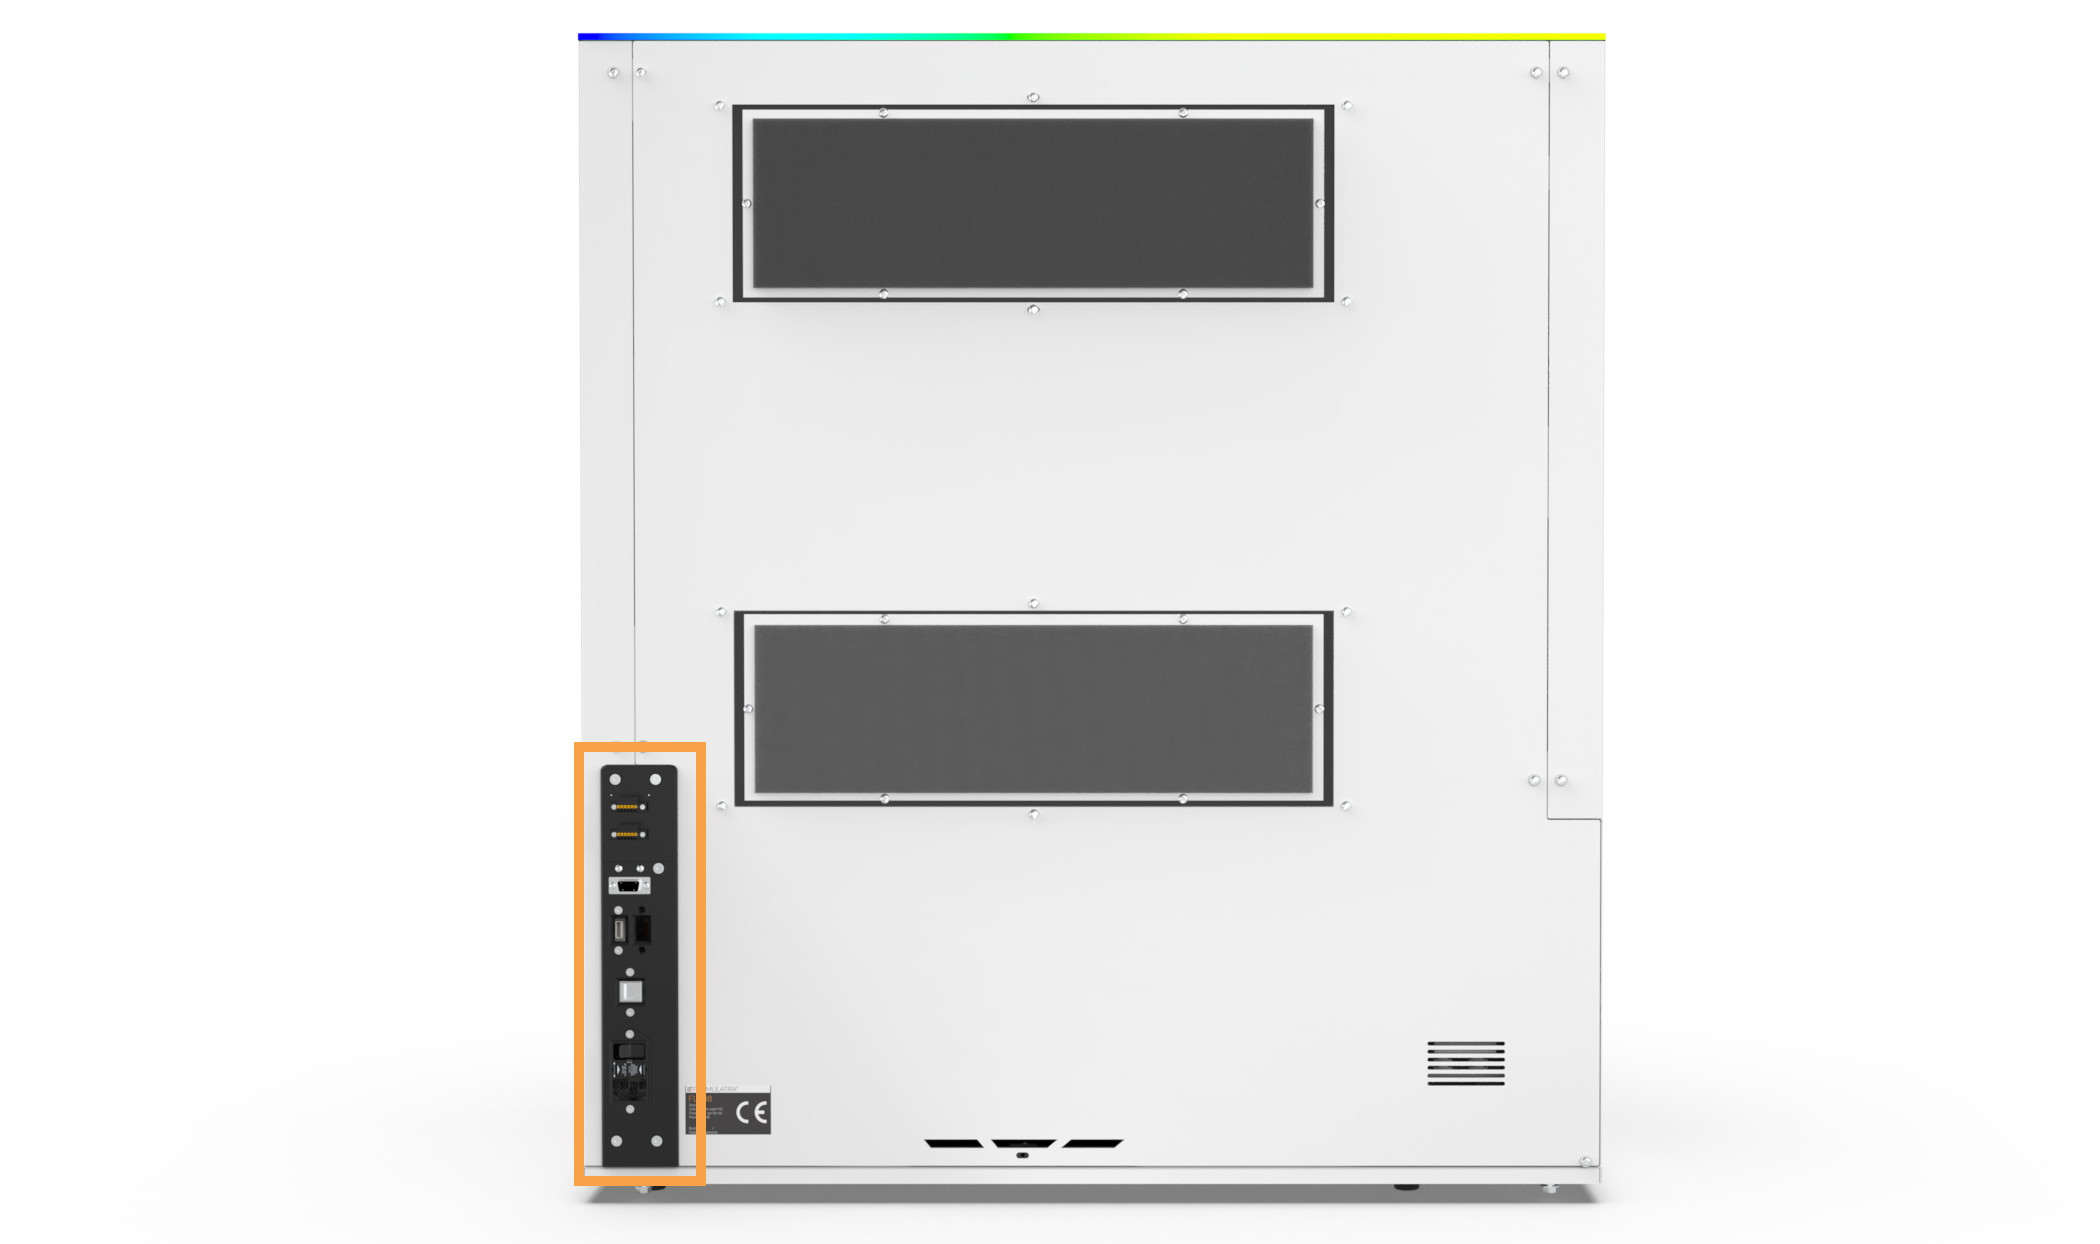
  1. Locate the connection panel at the back-left of the instrument.

The Connection Panel

The Connection Panel

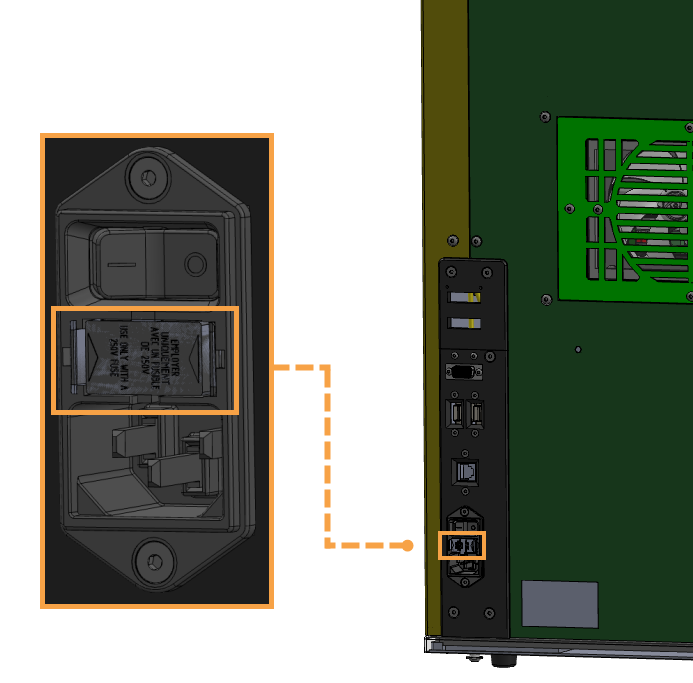
  1. Locate the fuse drawer in between the power button and power socket.

The Fuse Drawer

The Fuse Drawer

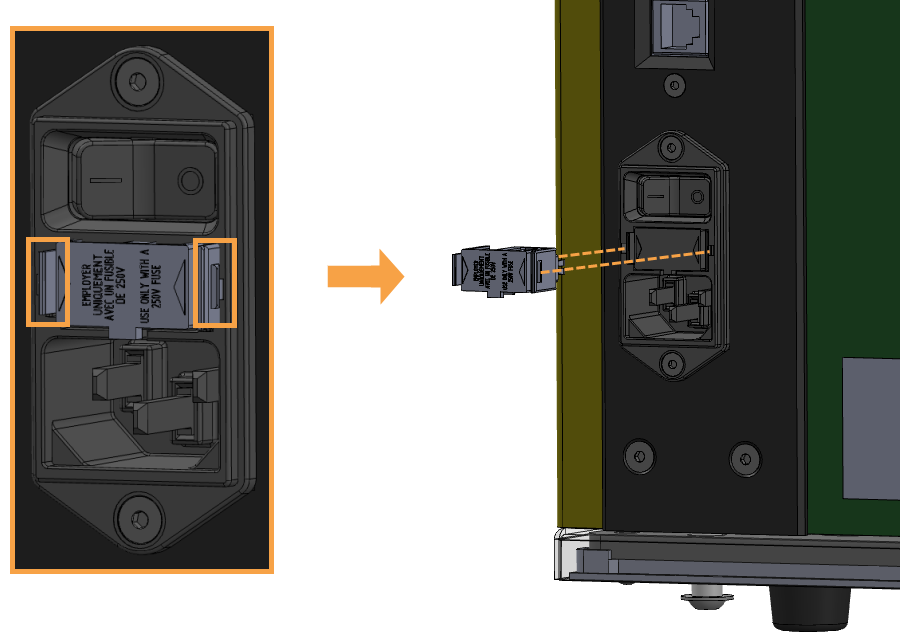
  1. Take out the drawer from the connection panel by sliding the tweezers’s tips to the holes as seen in the image below.

Removing the Fuse Drawer

Removing the Fuse Drawer

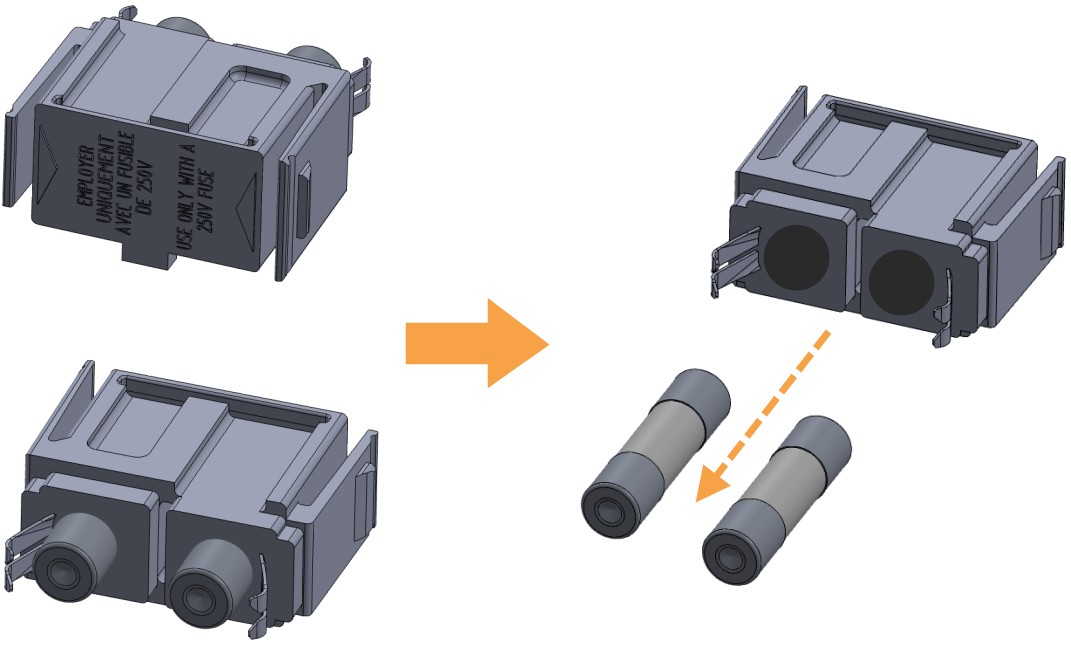
  1. Remove the broken fuse at the back of the drawer. Then, replace them with the new ones.

Note: You can install the 3A fuse in the drawer in any position.

Removing the 3A Fuse

Removing the 3A Fuse

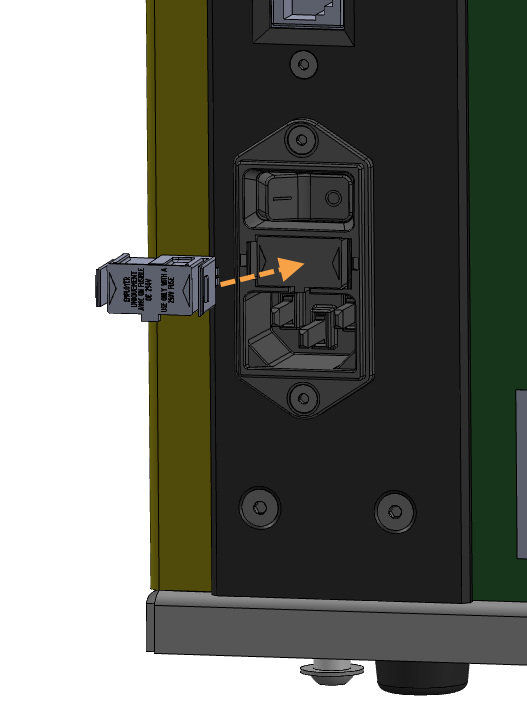
  1. Place the drawer back to the connection panel.

Placing the Fuse Drawer

Placing the Fuse Drawer

  1. Plug the power cord back to the connection panel. Then, turn on the instrument.
FLO i8 2.7
Updated on June 3, 2024

FORMULATRIX® is proudly powered by WordPress
Scroll To Top