Skip to content
formulatrix-logo

FLO i8 2.7

  • Specifications
  • Instument and Software Overview
    • Instrument Overview
    • Software Overview
  • Using the FLO i8 System
    • Concepts
      • Concept Definitions
      • Pauses in a Protocol
      • Pipetting Parameters
      • Sound Settings
      • Status Bar
      • List of Transfers
      • Dispense Report
        • Dispense Report
        • Dispense Report Explorer
    • Tutorials
      • Getting Started with FLO i8
      • Using the Pipetting Parameters
      • Adding a User Confirmation
      • Adding a Delay
      • Exporting Workflow
      • Importing Workflow
      • Powering Off the FLO i8
      • Creating a New Protocol
        • Creating a New Protocol
        • Creating a Simple Transfer
        • Creating a Serial Dilution
      • Executing a Protocol
        • Executing a Protocol
        • Adjusting a Protocol
        • Virtual Deck Layout Overview
  • Administrative Tasks
    • Managing Dispense Reports
    • Labware Manager
      • Labware Manager
      • Creating a New Labware
      • Managing Existing Labware
    • User Manager
      • User Manager
      • Managing User Account
    • Licensing
      • Licensing
      • License Activation and Reactivation
      • Software Upgrade and Revert
  • API Integration
    • API Integration V2.1
    • API Integration V2
    • API Integration V1.1
  • Troubleshooting
    • FAQs
    • Replacing O-rings
    • Replacing 3A Fuse
    • Error Recovery
      • Error Recovery
      • Error Recovery Settings
  • Help & Support
    • Help & Support
    • Reporting Errors Using Log Packages
  • Home
  • Docs
  • FLO i8® Liquid Handler
  • FLO i8 2.7
  • Using the FLO i8 System
  • Tutorials
  • Adding a Delay

Adding a Delay

You can add delay steps in a protocol, so that the FLO i8 system will pause the protocol execution for a set time. This is useful when you need to wait between protocol steps, for example to allow a chemical reaction to occur before continuing your protocol execution. In this section, you will learn how to add a delay into a protocol.

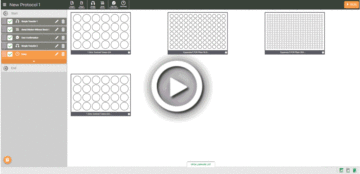
A Delay Step in the Protocol Editor Page

A Delay Step in the Protocol Editor Page


To add a delay:

  1. On the Navigator Bar at the top of the screen, click the Add Delay button .
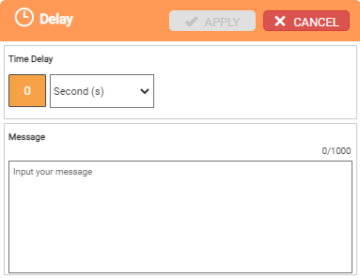
  2. In the Delay panel, set the desired period of delay time in Second(s), Minute(s) or Hour(s).
  3. OPTIONAL: In the Message panel, type a message to be displayed during the delay period.

Setting a Delay

Setting a Delay

  1. Click APPLY when you’re done.
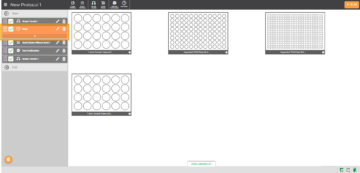
  2. By default, the new delay step will be added to the end of the pipetting step list automatically. To change the order of the delay step, click on the grid button of the selected step and drag to the desired location to move it. Click Apply to save the changes.

Change the Pipetting Step Order

Change the Pipetting Step Order

  1. OPTIONAL: Choose from the following options to add a new delay or modify an existing one.
    • To add more delays to the pipetting steps, repeat steps 1-5.
    • To modify the existing delay settings, click the Edit Card button  on the desired delay step, and change the settings as needed.
    • To remove the existing delay, click the Delete button  of the selected Delay step.

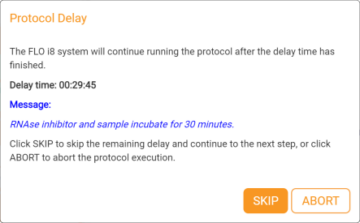
Note: When the delay message appears, the protocol execution will be paused. The FLO i8 system will resume the protocol execution when the delay time has ended. Click SKIP to skip the delay and directly continue to execute the next steps, or select ABORT to close the message and cancel the execution.

The Delay Message

The Delay Message


Related Topics

  • Executing a Protocol
  • Pauses in a Protocol
  • Adding a User Confirmation
FLO i8 2.7
Updated on June 3, 2024

FORMULATRIX® is proudly powered by WordPress
Scroll To Top