Running a Profile
Prerequisites
To run a profile:
- Tap the RUN button located in the upper-right corner of your screen.
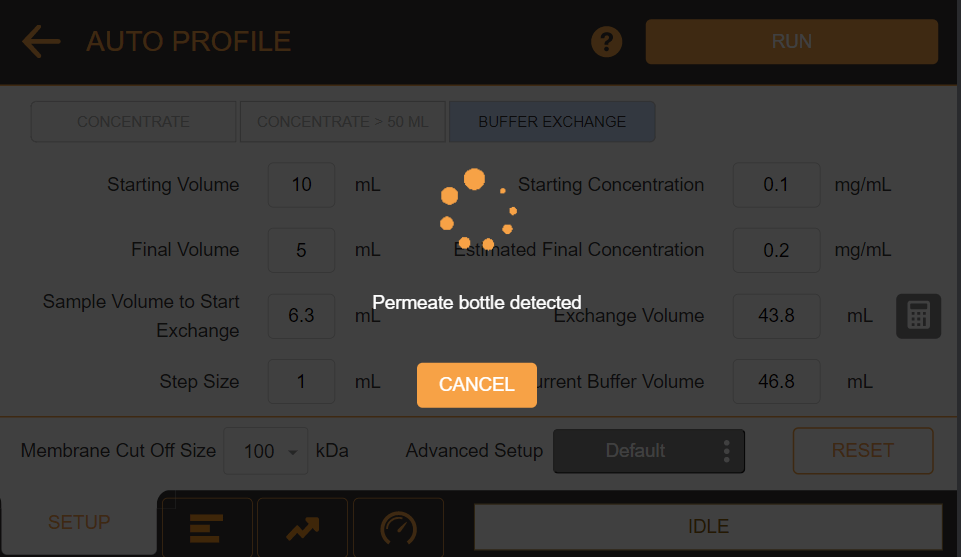
- Then, wait for the Components Availability Checker to ensure that all required components are properly attached.
- The profile will run and you can see the concentration progress in the STATUS tab, even from your external device. See Monitoring the µPULSE Status from an External Device for more information.
Important: If you hear a hissing sound and an error message appears, the silicone seals are not properly aligned with the filter chip, which will result in leaking. Before continuing, check the chip and the silicone seals and reposition them if necessary, then try again. If this problem persists, please contact support@formulatrix.com for assistance. For more information, see Fixing Silicone Seals and Chip Leakage.
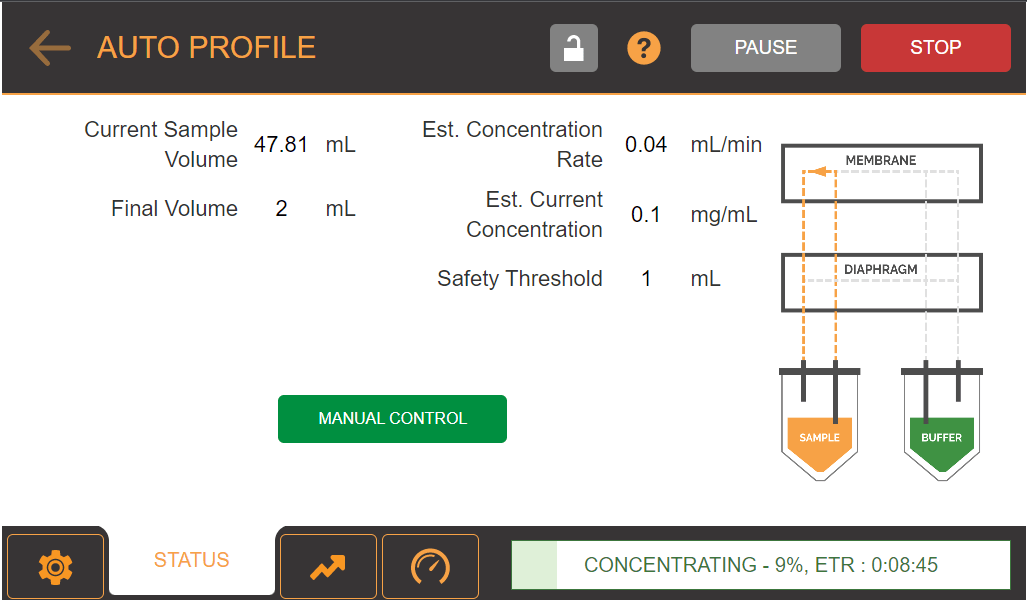
- The cycle will pause and switch to Manual Control when the final volume is less than 3 mL. This allow you to check the volume before finishing the profile and to prevent µPULSE from over concentrating the sample.
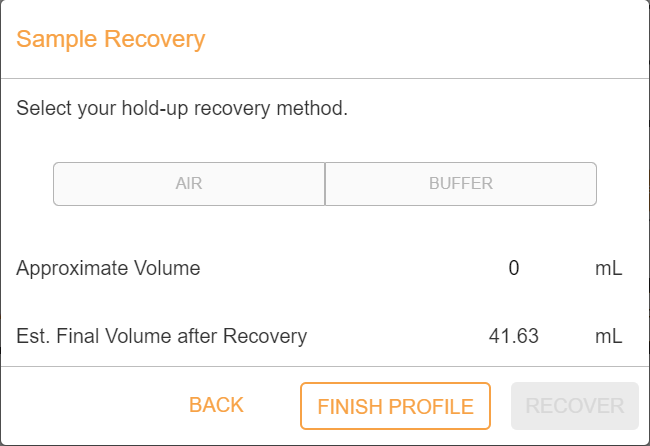
- Once your sample has reached the desired volume, tap Proceed to Recovery and select one of the liquid recovery options.
- AIR: Tap to use air for the liquid recovery. Make sure your liquid level in the tubes is below the short tubing (<15 mL) so that µPULSE can use the air.
- BUFFER: Tap to use buffer for the liquid recovery.
- If you select AIR or BUFFER define the Approximate Volume and µPULSE will automatically calculate the Est. Final Volume after Recovery in mL.
- Tap RECOVER to initiate the recovery process, or tap FINISH PROFILE if you wish to finish the recovery process.
- When the cycle is complete, open the chip cover and carefully remove the chip, tubing block, and tubes.
STATUS, GRAPH, and PARAMETERS Tabs
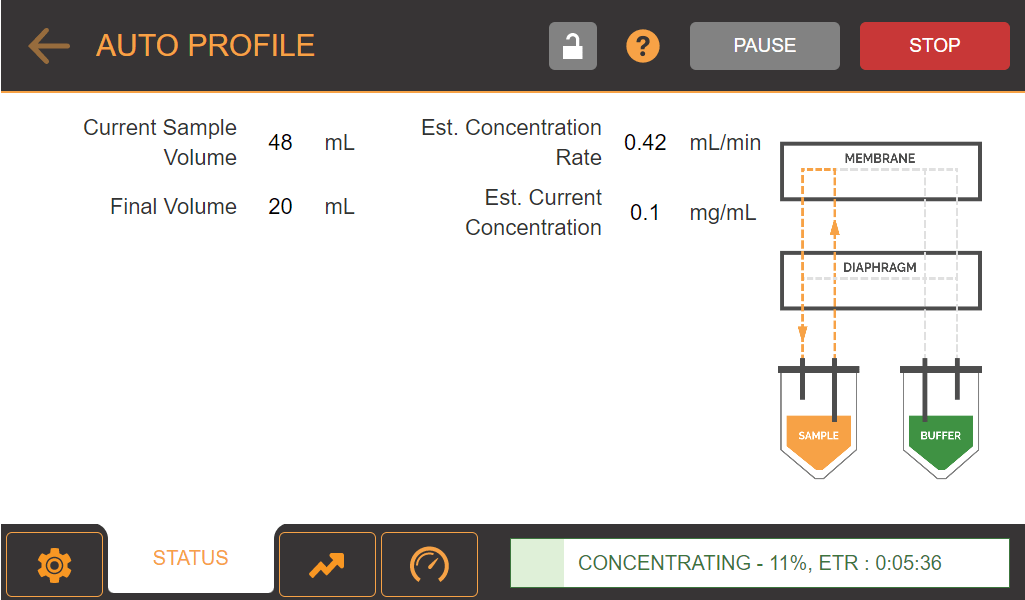
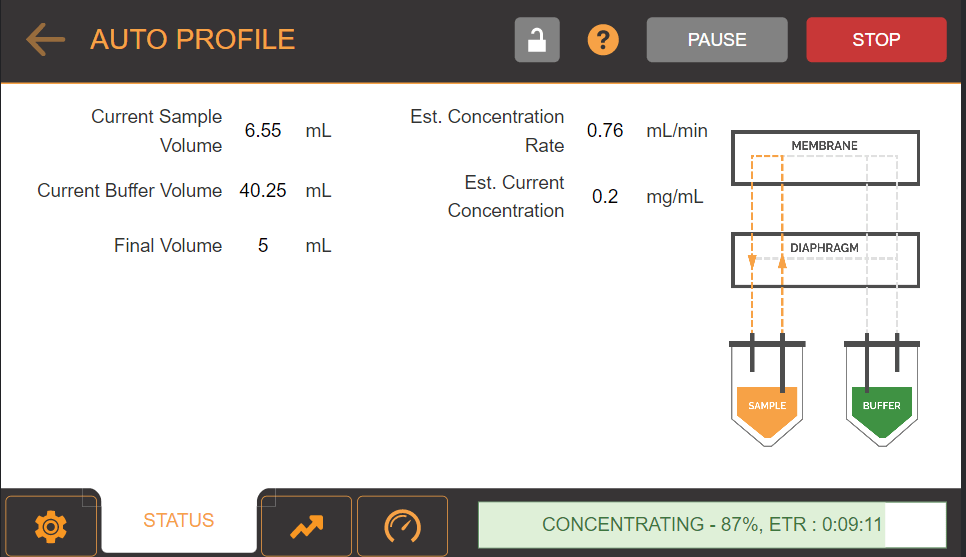
The STATUS tab allows you to check and monitor any processes being executed by the µPULSE hardware.
- Current Sample Volume — Shows the sample volume value in mL.
- Current Buffer Volume — Shows the buffer volume value in mL.
- Final Volume — Shows the final volume in mL.
- Estimated Concentration Rate — Shows the estimated final concentration, calculated in real time.
- Estimated Current Concentration— Shows the estimated concentration calculated based on the current sample volume.
- Safety Treshold— Shows volume threshold to prevent overconcentration if the final volume is less than 3 mL.
- MANUAL CONTROL — Tap the MANUAL CONTROL button to switch to manual control.
- Progress Bar — Shows the name of the current sequence, completion percentage, and Estimated Time Remaining (ETR) in HH:MM:SS.
- Lock Button
 — Tap this button to secure your protocol execution using a PIN.
 - Help Button
 — Tap this button to get the detail information about Auto Profile.
 - PAUSE — Tap the PAUSE button to pause the concentration process for a period of time.
- STOP — Tap the STOP button to stop the concentration process.
- CONTINUE — Tap the CONTINUE button to resume the process after pausing.
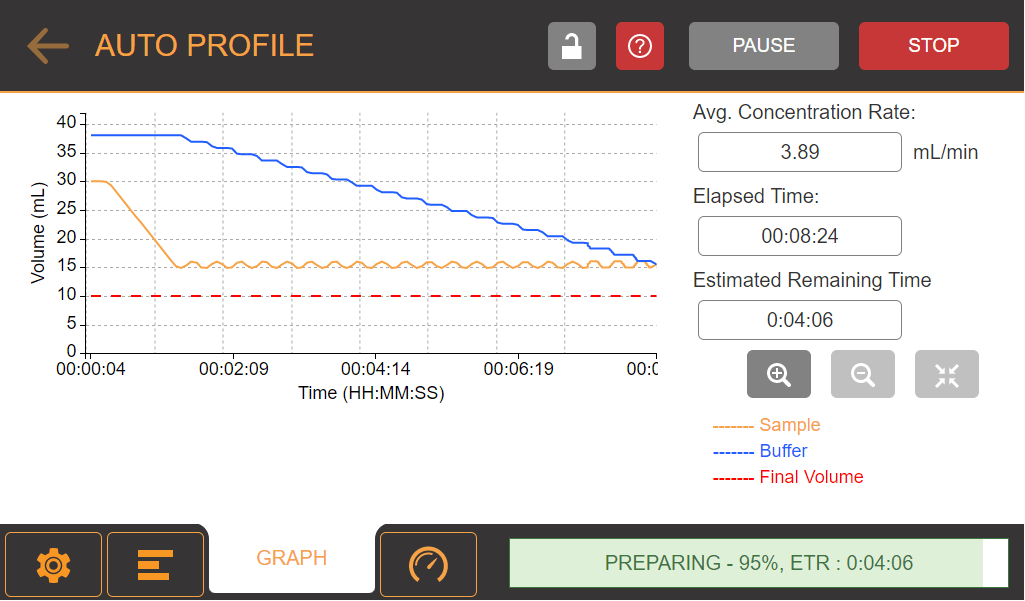
The GRAPH tab shows the volume vs. time comparison in real time during execution.
It provides a visual representation of the sample and buffer volumes as the µPULSE runs a profile. When the instrument is active, the lines will have color (Sample= Orange, Buffer= Blue, Target Final Volume= Red).
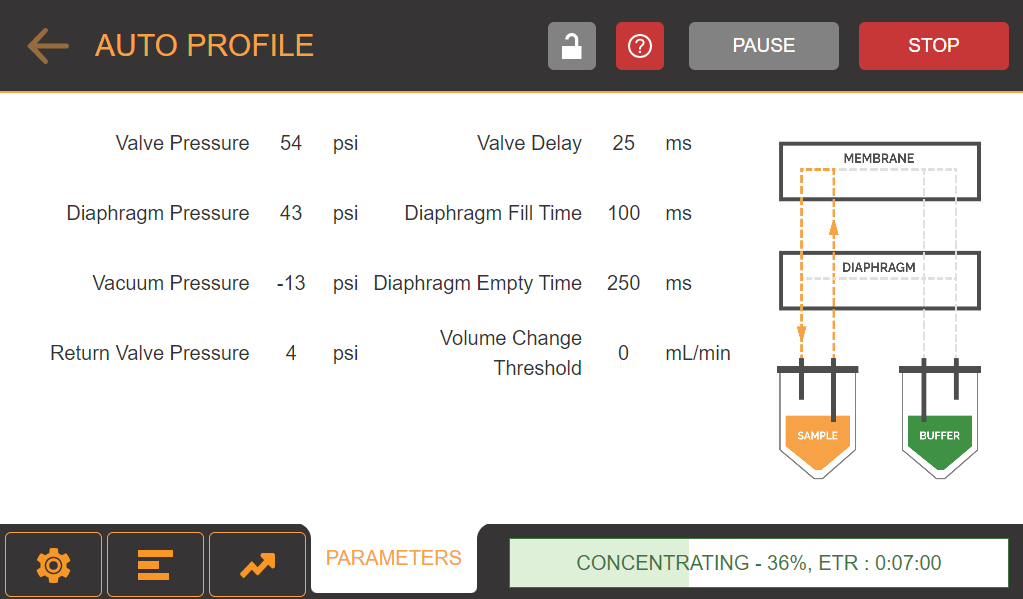
Click the PARAMETERS tab to monitor the pressures in real time.
FORMULATRIX® is proudly powered by WordPress
